August, 2001
 |
 |
| Look at
an old stucco house. It's usually in good shape
except the chimney. The cap, which is mortar
spread on the top of the chimney, cracks, spalls
and deteriorates. The water damages the stucco, which should last forever, provided a lot of water doesn't get behind it. Solution- check your cap every 5 years and coat over if needed. |
Here an old brick chimney was stuccoed.
The bands at the top were added. These not only add a decorative effect, but prevent water from running down the face of the stucco. |
 |
 |
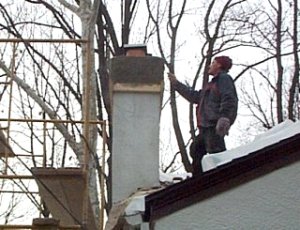
| EIFS chimney before we tore off the EIFS
and put on new OSB. The same details will be duplicated
with stucco (cement mortar).
The
sheathing was badly rotted but the |
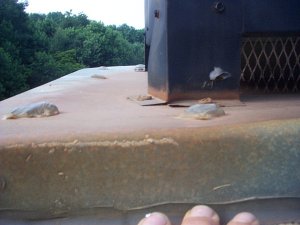
Metal
cap on new house leaks bad. The metal is secured with
nails covered with globs of caulking. The caulking has
cracked up and shrunk allowing water to enter 6 year
old chimney. Where my fingers are is another caulk
joint which has shrunk and cracked allowing
water to enter between the EIFS and the metal
cap. We covered the cap with lath and mortar. These metal caps are a joke. They leak and allow rust stains to run down the chimney. |
 |
 |
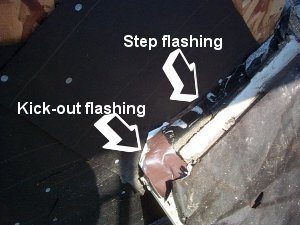
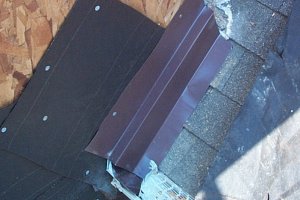
| View of
side of chimney showing the original step
flashing and a kick-out flashing we made. The kick-out
diverts water from the flashing into the gutter.
These are critical in preventing water from
running behind the stucco. The step flashing was in good shape so we re-used it. Most of the sheathing was rotted and had to be replaced. |
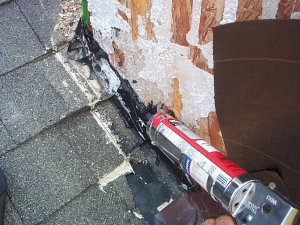
Step flashing is sealed with black stuff
from Home Cheap-o. This is the same black stuff that comes in a can and gets all over the place. I felt that in a tube, it wouldn't get all over the place. |
 |
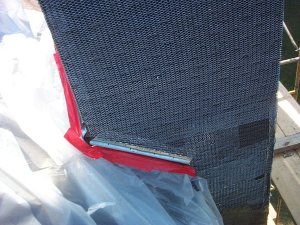 |
| Counter flashing is bent with a metal brake to cover the step flashing. The counter flashing prevents water from getting behind the step flashing. | 3/4"
plaster stop (casing bead) is butted to counter
flashing. This defines an edge for the bottom of
the stucco and defines the thickness. The flashing is covered with red tape and plastic before stucco mortar is applied. Tar paper and self-furring lath are applied to the chimney. |
 |
 |
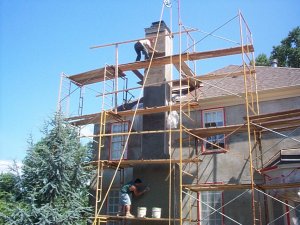
| Juan C. rods off the brown coat while
Edgar rubs the mortar with a float after it sets. |
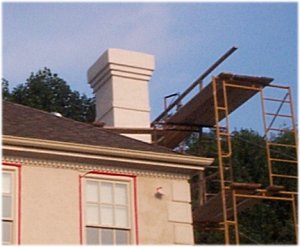
Scaffold-cam
shows
2x4 forms nailed to the chimney to define the
first step. The band has an additional layer of
metal lath and a scratch coat applied.
The metal cap at the top is covered with |
 |
 |
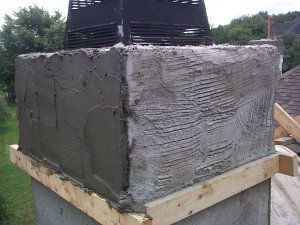
| After the first layer sets, the next step
is formed and filled, then the last step is formed and filled. I had
pictures of each step, but they got
|
Finished
chimney
with white portland and white sand. The top is
slightly rounded to allow water to run off.
The three steps at the top add a nice decorative as well as functional effect. Note the decorative band 2 feet below the steps. This was formed with 1x4 s and filled with lath and mortar. The cap (the very top) will need to be checked every 5 years for spalling or deterioration and recoated as needed. It sure beats that metal that was there. |