How to put metal lath on a ceiling
How do I put metal lath on a ceiling? Every time we try there are bubbles and wrinkles in the lath.
How do I put metal lath on a ceiling? Every time we try there are bubbles and wrinkles in the lath.
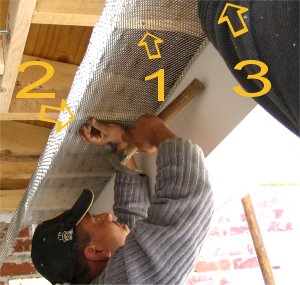
Lath is allowed to flop over to form a curve. The curve in the lath forms a rib like shape to hold the lath straight. The first row of nails is started about 6 inches from the edge. There are 5 rows in all. The first nail is started in the center of the row. The row is nailed from the center out, holding the sheet straight, as shown by the arrows.
The first row of nails is finished, nailing to the ends of the sheet of lath.
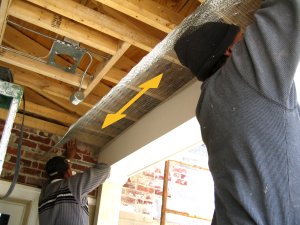
The second row of nails is started in the center, holding the lath in a curve still to keep it straight. The first nail is started in the center, like before. The nailing sequence is from the center to the edges to keep a straight line.
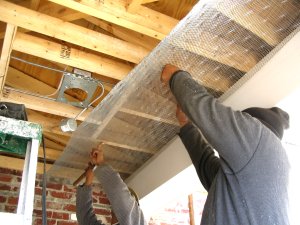
The from third row nailed 3/4 of the the way over from the edge. There is no need to nail the edges yet. The edge can be nailed when the next sheet is put up and overlapped.
Durock is a good crack resisting substrate for stucco, providing metal lath is applied over the durock, attaching to the wood through the durock with nails or screws.

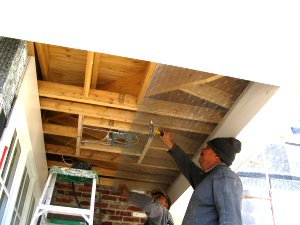
The edge of the overlapping sheet can be nailed at the same time. Note a good 3 inch overlap. It is important to tie the laps with tie wire between each joist. This prevents the lath from sagging when the scratch coat is applied. Tie wire ties are made crossways pulling the lath tight.