Stucco and the blind man
Chapter 9: Cool stuff
A collection of pictures of decorative details, from a 24 year old website.
I wanted to show some cool stuff we have done over the years, and I have published on my 24 year old website. I published my first website about plaster in 1996, when a whopping 0.7% of the population had access to the internet. I registered my domain, rtbullard.com, in late 1998, and my first jobs in progress was published in January, 1999.
Before I registered my domain I had a tilde site. The tilde ( ~ ) , is the character over a Spanish n, and in the top left corner of your keyboard. What a tilde site was, is when an internet service provider had free web space for it’s customers. For example, if you had an account with AOL, and your user name is jjones, and email address is [email protected], your website is http://www.aol.com/~jjones. Most Internet Service Providers offered 5-10 Megabytes of free web space with an account. My tilde address was http://www.pipeline.com/~rbullard. I subscribed to Pipeline, the first national flat rate internet service at $19.95 a month. Other services charged by the hour. I published my tilde address in the yellow pages and everywhere I could.
There were free websites also, such as angelfire. You could get free space with a tilde site, for example, http://www.angelfire,com/~jsmith. There was an uproar when angelfire had a server crash and all the websites were wiped out. They didn’t use raid servers or make backups. Everybody lost their sites, unless they backed them up locally.
I am putting some of these pictures in the original size, sometimes 280 pixels or 240 pixels wide. Sometimes they were poor quality, so if I stretched the pictures across the page, they would look worse. My first website was about a historic church we plastered, and explaining the hazards of EIFS. Before I had a digital camera, I took my rolls of film and had them scanned to a photo CD, for about 40 bucks. A real innovator in those days was Seattle film works. Seattle film works gave you free film. The film was movie film, and not camera film, and they were they only ones who could develop your pictures. As soon as 1998, they would email you a link, and you could download your pictures from their ftp site. The scans were only 320 pixels wide, but so what ? My ornamental plaster ring pictures (link here) were Seattle film works pictures that I stretched and you can see what is going on. BTW, where I took the pictures of this ring, there were big signsthat said "no cameras or picture taking allowed", but fortunately, I took pictures anyway.
I got my first digital camera in 1999 at Circuit City, another defunct icon. I got a demo model for only about $70. I could take pictures that I could stretch to 320 pixels wide with the included Kodak software. Even in later years, when I had better resolution, I shrunk the pictures down to a small size to reduce the file size. This was important when telephone modems still roamed the earth, and page loading time was important. My site was about pictures, so I shrunk them all I could and still be able to see what is going on. After shrinking the pictures, I usually reduced the quality of the jpeg’s to further reduce the file size. Some of these old pictures started at 22 kb.’s for example, and I reduced them down to 11 kb.’s without changing the display size.
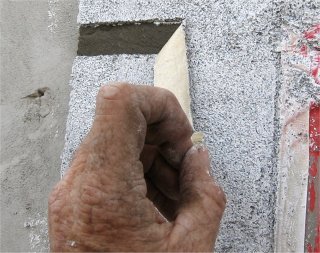
Here is a telephone niche I made using Milestone in 2002. I hand tooled the faux slate and the joints. A 280 and a 320 pixel wide picture,
but hopefully you can see it. My slates look real. It would have probably been easier to use real slate.
Original page here...
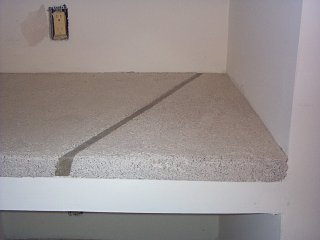
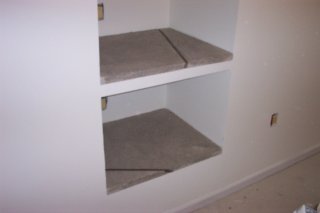
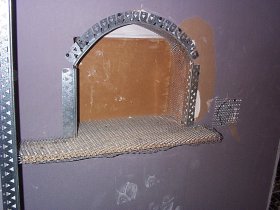
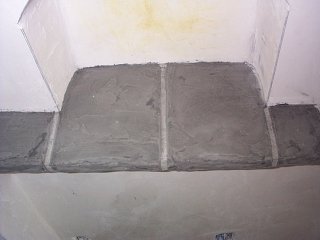
I made these faux granite shelves using Milestone. These are 320 pixel wide pictures.
I had just bought a 1 megapixel camera, but it took bad photos. If I brightened them up, they would be too blurry. The joints were angled to give the appearance of stones that were cut at random angles.
Original page here...
I made the radius curve, that is the round corner, with lath and plaster. The challenge was a wood trim block to go on the corner. I formed and made the blocks with milestone. I used a real sandy mortar, and a brown color to look like
a cut stone. I ever cut in a lamb's tongue.
Original page here...
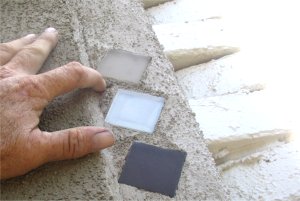
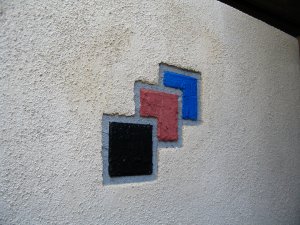
Check out my colorful tile inlays:
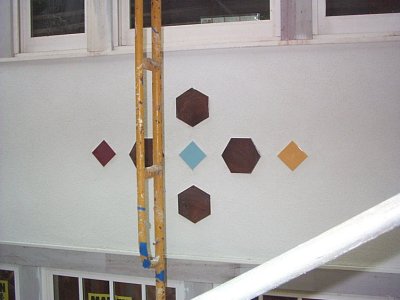
Color tile design livens up a white stucco wall. I put the tiles on the brown coat, and mortared them on with the finish coat.
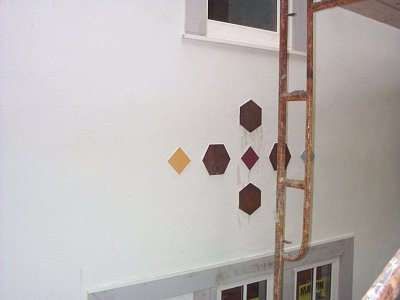
I changed the position of the blue, yellow and red tiles on each of the three sides.
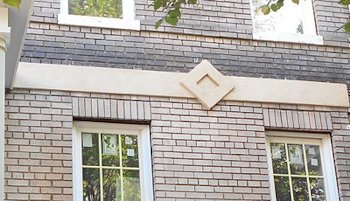
A design on the gable matches the walls.

LEFT: Tile inlays I did in the plaster in my dining room.
Here's the page with my dining room.
RIGHT: A design of inlaid glass tiles on a transition between the stucco
and the brick wall.
Here's the page with the glass tiles.
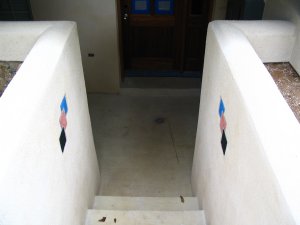
Tile inlays on the columns of this terrace we stuccoed. The tiles are placed off center towards the terrace. The tiles seem to invite one to climb up the stairs.
Here's the page with the job..
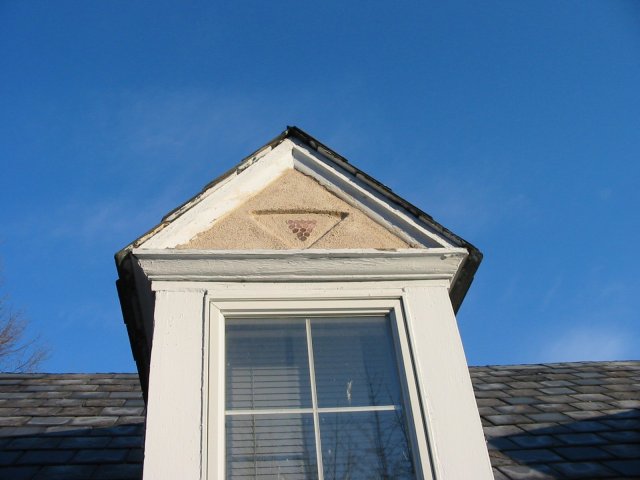
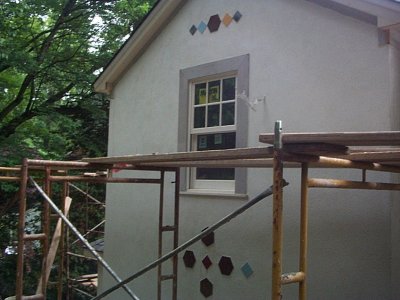
Triangles made of pennies are put on the dormers on a house we stuccoed in Baltimore.
First, we did a inlay in the stucco by putting on triangular pieces of plywood and filling in. I wish
I used straighter pieces of plywood now. The pennies were really put on upside down. I went to get materials
and an employee of mine didn't follow instructions. See how much nicer it would look if the pennies were inverted.
It would give the inverted triangles a diamond like look. I originally was going to use 4 rows of pennies, but
got out argued by my employees who insisted I was too cheap to spend another 5 cents per window. Still, mission was
accomplished. A decoration in the stucco up high draws the attention upward, viewing the whole wall as a creative work.
Here's the page with the job..
My late wife had a habit of scrounging valuable stuff from trash piles, which gave me some of my ideas. Don’t laugh, she found diamond jewelry still in the original cases, and a hand carved wooden chair worth thousands. I think the jewelry was stolen and ditched by the thieves. There was a police raid at the apartment buildings where she found them the same day. I still have a lot of things she found, like tool boxes mechanic’s tools , a foreign coin collection and more.
Two things my late wife brought with the idea of designs in stucco were this old burner and a plastic table:
This is a burner from an old gas stove, scrounged from a trash pile. You know what they say about about one man's trash.
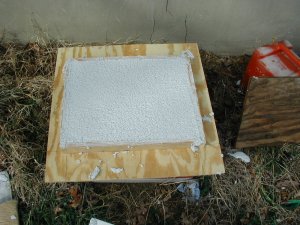
I made a box with plywood and 1-1/2" furring lumber. I poured in my my white portland cement and sand mix and rodded it off flush.
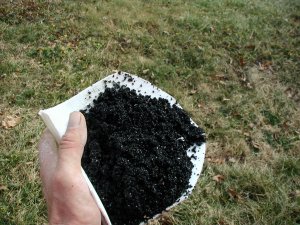
This black sand is called "black beauty". It is a slag product. I mixed in some in because I thought it looks cool.
After my block set up for a couple of hours I beat my burner into the mix. I tied a stick on so I could pull it back out.
Voila. I troweled the block and neatened it up a little. This is upside down. I turned the "feet"of my design down to create the illusion of supporting weight.
Scaffold cam shows setting the block in place. We drilled a hole in the back, drove a nail in the chimney, and hung it like a picture. We put a portland cement and sand mix using pure flex con instead of water in the mortar behind and stuck it on the chimney. Left over mortar is packed around the sides for more support.
Here's the page with the job with the burner block....
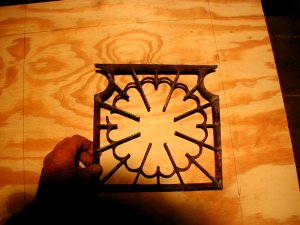
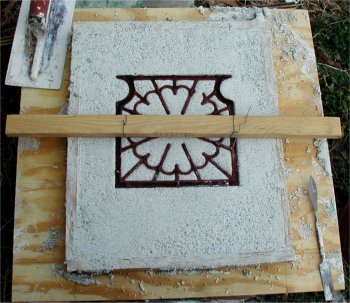
Proteus emerged on my site in 2004. Proteus is really me, my artist alter ego. I wanted to be an artist, but I don't like to suffer. The art is better if the artist suffers. Proteus lives in a distant city, and drops in to share his creative ideas for stucco. He probably goes snow boarding in the winter, and lives in a dumpy apartment with a 1950's refrigerator that is painted orange.
Project begins from this plastic table Proteus found on a trash pile. I'm sorry the sides got thrown away. They would have made a great cast as well.
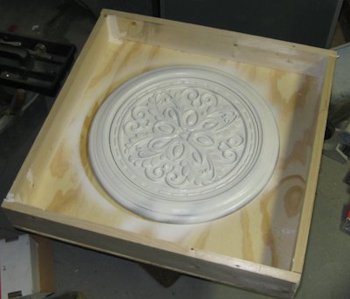
Proteus took the top off and painted it white. This is to seal any pores that might catch the mold rubber and seal up any dirt or goo. A box is made from a square piece of plywood. and one by fours.
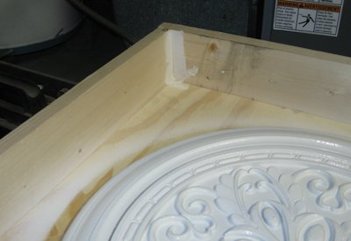
Joints in the plywood are sealed with vinyl Spackle. The edge of the medallion (where the medallion joint the plywood) are also sealed.
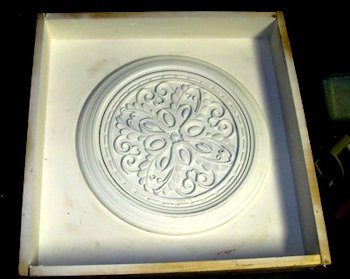
Inside of box is spray painted. This seals the pores and eliminates the need for mold release. The medallion is sprayed with mold release that was bought at the craft store (Michael's)
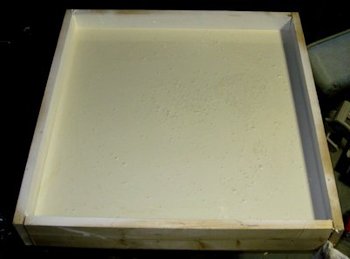
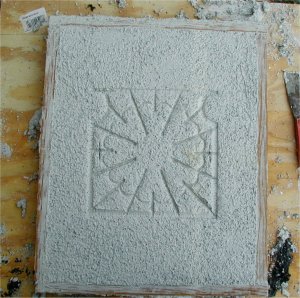
Box is set on a level area and poured with PMC 724 from Smooth-on. Room was left in the box to pour a plaster mold backup. It is more economical to just cover the model 1/2" or so with mold rubber, and fill the rest with plaster. This was poured extra thick and level, so there is no need for a backup, but it costs more in material to to it this way. All Proteus cares about is the work, he disregards his personal safety and well being.
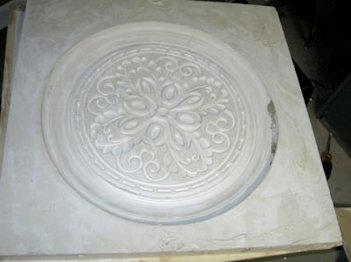
What we have here is a very durable rubber mold that be used to cast left over stucco finish, moulding plaster or concrete. The inside should be sprayed with mold release every pour. The excess mold release should be wiped off. Too much mold release can soften and weaken the surface.
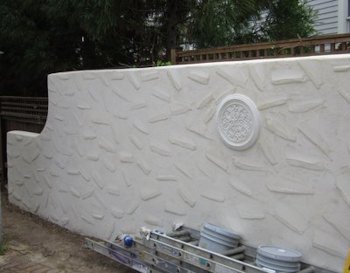
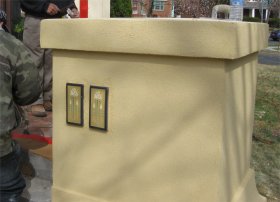
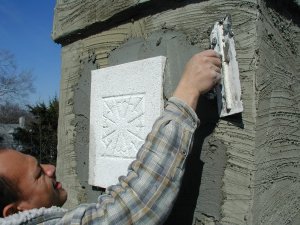
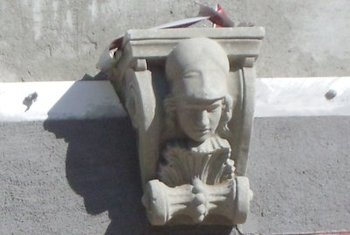
I put the medallions on a couple jobs. This 1901 house had cast medallions so the medallions were right on time.
Here's the page with the job..
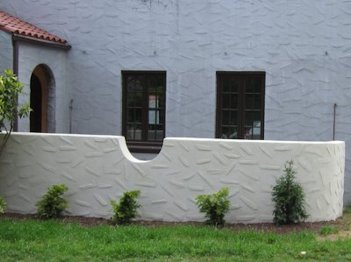
We rehabbed this old garden wall and extended up with new blocks. The round peek through was my idea. The round shape matched the various arches and curves on the house.
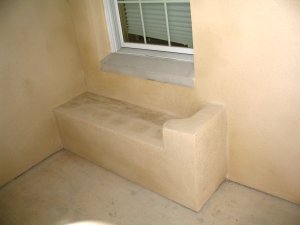
This window seat was my idea to hide a chunk of concrete, that happened when a form broke.
Check out my arm rest with the drink holder.
Here's the page with the job..
The designs on the stairway walls seem to draw one down to the basement apartment.
My overlapping squares were colored with colored milestone. It would have been a lot simpler just to paint them.
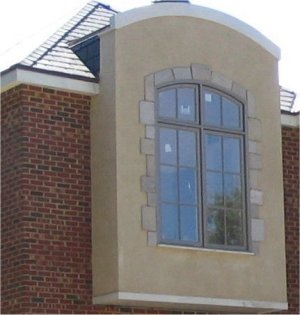
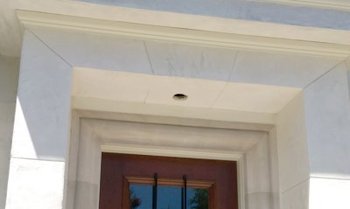
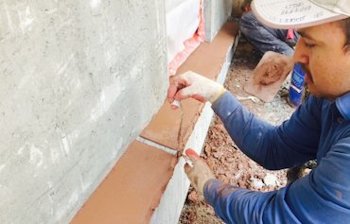
Faux stone lintels project past the edge of the window to create the illusion they are supported by masonry.
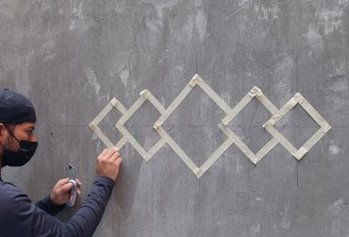
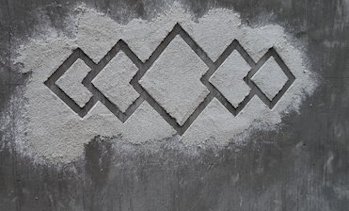
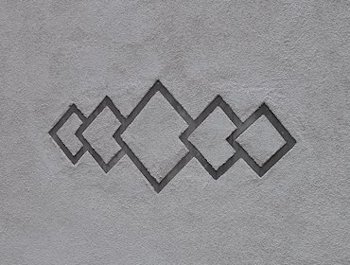
More tape squares. Concrete is coated with stucco finish.
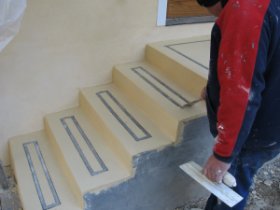
I did tape line grooves for traction.
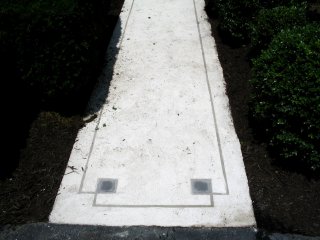
More concrete coating with squares. I quit coating concrete. The color is too problematic.
Faux stones using tape joints.
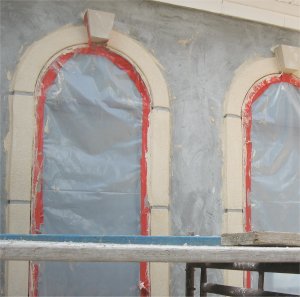
Sandstone-like window surrounds.
Faux granite surrounds. White portland is mixed with white sand and black glass for a granite effect. More here..
1/4" automotive masking tape was used for these faux limestone blocks.
A stucco band was used to hide where the old porch was. The squares are used to disguise the fact the band was hiding something, and was intentional. Other buildings on the street had squares and diamonds, so it blended in.
More details here..
Keystones are Athena.
More details here..
Faux brownstone water table is made using tape joints.
Faux limestone lintels and faux brownstone sills.
More details here..
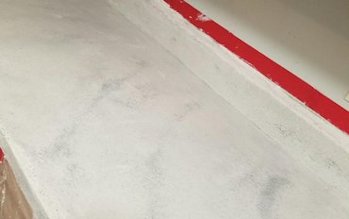
Stucco counter top. Granite effect is mad by sprinkling black glass on top and troweling the glass into the top.
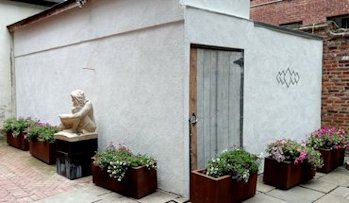
My design in the stucco in the sculpture garden at the Arts Club of Washington.
Tape is used for my overlapping square design.
We finished around the tape first, and pulled the tape off.
Overlapping squares add depth to the wall. I was going to paint the squares, but everybody talked me out of it. They look so much nicer white.
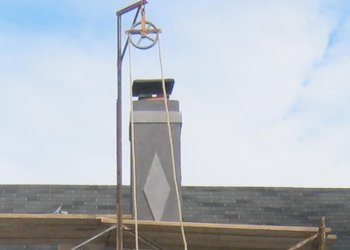
I almost forgot my diamond chimney. The band and the diamond are finished a lighter color for contrast.
This adds a 1950's look.
How we did the diamond here..
These designs in the stucco aren't really a lot of work, but add a dramatic effect to the work. Walking around an old neighborhood like Chevy Chase, you can discover small unique features done by the tradesmen years ago to put their signature on the job.
Thanks so much dear readers, for reading all these years, and for all the comments.